Changing Fonts on Your Tumblr Post: A Guide for the Bold and Curious
Are you tired of the same old fonts on your Tumblr posts? Do you want your blog to stand out in the dazzling universe of online content? Well, you’re in the right place! Changing fonts on your Tumblr posts can seem as easy as pie—or as tricky as getting your cat to learn a trick. But fear not, dear reader! We’re about to dive deep into how you can transform your Tumblr experience one letter at a time. Let’s make those posts pop!
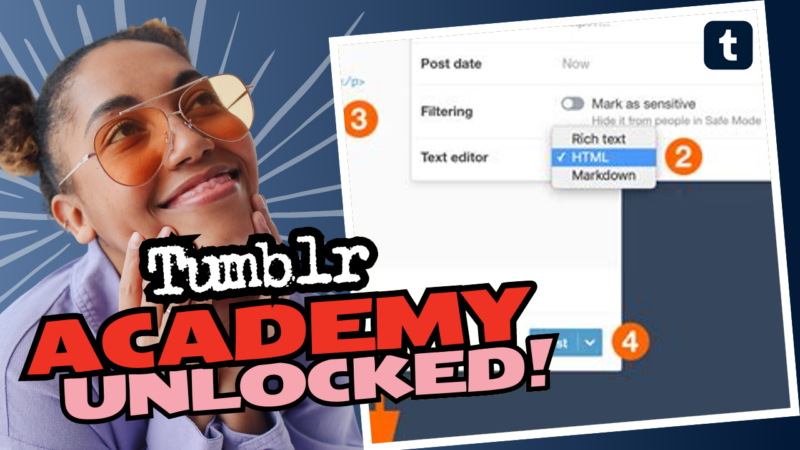
Step 1: Get the HTML Ready
First things first, you need to access the HTML of your Tumblr theme. Head over to this lovely link where you might find the HTML of your theme conveniently uploaded for your perusal. It’s like finding a treasure chest but without the pirates!
Now that you’re in your HTML code, it’s time to search for the section where styling lives. Look for something like body { font-size: 14px; }. This is where you can start to tweak the text size to your preference.
Step 2: Adjust the Font Size
Want to change how big your text appears? You can easily tweak it by modifying the CSS. For instance, you can replace font-size: 14px; with font-size: large; or whatever size floats your boat. Word to the wise: be careful with the font sizes; we don’t want to go from “readable” to “squinting at the screen like a confused raccoon,” do we?
To make sure that this font size change applies only to your posts and not any random elements of your theme, locate this beauty of a rule:
#posts{padding:calc(30px + {select:Post Padding}px) 0px;padding-top:0px;}
Change it to:
#posts{padding:calc(30px + {select:Post Padding}px) 0px;padding-top:0px; font-size: large !important;}
This little edit makes your posts feel bigger, bolder, and even a tad more luxurious. Fancy, huh?
Step 3: Know Your Weapon: CSS vs. HTML
As you dig into edits, you might find yourself asking, “Am I editing in the right place?” Well, here’s the scoop: If you’re editing through the Tumblr app, the changes might not appear as intended. To really get that customization juju going, stick to the desktop/web version. And if your description has its own magical layout, you might need to dabble in CSS instead of plain HTML. Exciting, right?
In case you’re wondering how to use CSS to amp up your post descriptions, here comes the fun part:
Using Inline Styles
For quick fixes, try adding inline styles! This option allows you to change the font style for individual pieces of text. You can utilize:
- <font style=”font-size: 12px”>your text</font> – for those nostalgic vibes.
- <p style=”font-size:12px”>text here</p> – perfect for paragraphs.
- <span style=”font-size:12px”>text here</span> – versatile and snazzy!
Just replace 12px with whatever size makes your heart flutter or your eyes sparkle—just not too big to look like you wrote in Comic Sans, okay?
Step 4: Using a Style Block
If you want to change multiple items at once (and who doesn’t?), consider adding a style block into the <head> section of your HTML. It’s kind of like putting a crown on your theme! Here’s how:
<style> .example p { color: #blue; padding-top: 5px; } </style>
Simply make sure you’ve created the right class names based on what you want to change. That’s just code-nerd talk for, “Name it something you can remember.” So your profile info could look mad cool if you add:
<p style=”color: #blue; padding-top: 5px;”>Your text here</p> Step 5: Settle the CSS vs. HTML Debate
At this point, you may be scratching your head wondering if you should still be focused on CSS or HTML. Truth is, if the theme has intricate styles already implemented, you might just need a little finesse with the CSS approach. We don’t run from challenges around here!
Be prepared for some trial and error. Sometimes you’ll nail it and sometimes you’ll end up with text on a wild adventure. Honestly, sometimes it’s worth a good laugh if you mess up something and have to unravel the coding fiasco.
What if None of That Works?
Ah, the dreaded question: what if everything you tried has led to absolutely no changes? Don’t get disheartened! If you twitch your fingers towards editing the Description tag in your layout and it’s still a no-go, here’s a list of questions to consider before you put on the defeatist hat:
- What is it you’re trying to achieve? – Write down your goals; this is like your “change manifesto.”
- How far have you gone? – Be a detective of your own journey; reflect on how much you’ve accomplished so far!
- What are you stuck on? – Pinpoint the sticky spots. Logic reigns supreme!
- What did you already try? – Sometimes it turns out that what you did would have worked if you’d changed color to purple!
Season the Code with HTML Magic
When the chips are down and coding wizards don’t have a clue, consider PMing help from fellow Tumblr users or HTML forums. Post your example code, show what you’ve done, provide links to those fabulous failed attempts. Honestly, move in like a social butterfly, and you may just find someone with the golden code to save the day!
Wrapping it Up: Your New Code Style!
As you march onward in your quest for the perfect Tumblr post font, remember that a cohesive style is key! Make your Tumblr posts a reflection of your unique personality. Don’t be afraid to get creative and let your inner font connoisseur shine.
And if all else fails? Always keep your eyes peeled for new themes that might make all this code-editing business feel like riding a unicorn through a field of rainbows. Fancy schmancy!
Now, go forth and bring your blog to life with stunning fonts and killer styles. Your posts deserve to shine in the spotlight! Cheers to a textured, typewritten Tumblr experience.

